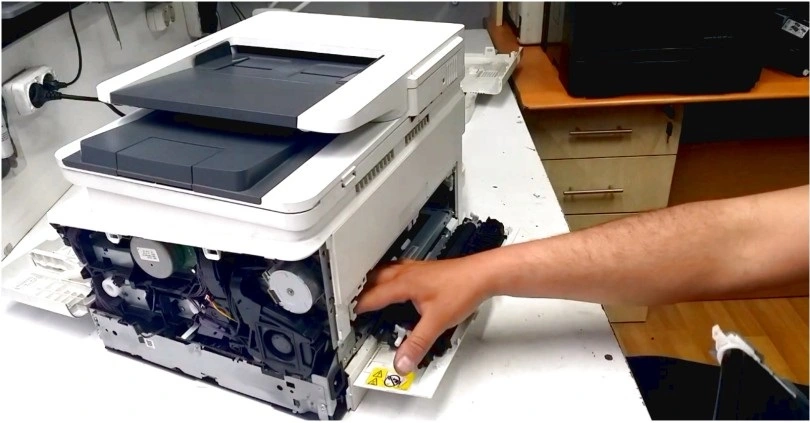
Common Laser Printer Problems: Like the majority of mechanical systems, laser printers may malfunction or yield strange or inconsistent results. Each laser printer model is unique and subject to distinct defects. The difficulties that can occur with laser printers are discussed in the next chapter, along with their potential causes.
Although it doesn’t replace the troubleshooting section in a laser printer user manual, the advice provided in this chapter may shed some light on why a specific issue arises. Before attempting to use the techniques outlined in this chapter, always read and respect the warnings and instructions provided in the laser printer user manual as well as the cautions listed below.
Caution: The photoreceptor must be examined for a few of the operations in this chapter. Since the photoreceptor is light-sensitive, prolonged exposure to light is not recommended. A photoreceptor should not be exposed to light for longer than a few minutes or the quality of the prints may suffer.
WARNING: Examining the fuser or fuser cleaning pad is necessary for some of the methods in this chapter. When in use, the fuser gets quite hot. Switch off the printer and let the fuser cool for at least 15 minutes before inspecting it or the fuser cleaning pad.
WARNING: A laser printer has parts that operate at high voltage. Prior to performing any cleaning or maintenance tasks, always turn the printer off.
Print Quality Problems
Various print quality issues can occasionally occur in laser printers, but the majority of them are very easy to fix.
Fuzzy Print
The paper, not the printer, is likely to be at fault if a page has “fuzzy” print, letters, or images that are not as sharp and clean-edged as usual. The usual culprit for fuzzy print is printing on slightly wet paper. Paper can become damp after a prolonged period of storage outside of its wrapper because paper absorbs moisture from the air. Printing on recently opened paper might work.
Fuzzy/Faint White Lines
The transfer corotron is probably unclean if a sheet has a fuzzy white line running the length of it where the print is illegible or nonexistent. Toner or paper dust particles can disrupt the electrostatic field surrounding the transfer corotron, preventing toner from being drawn from the photoreceptor onto the paper. Open the printer and carefully inspect the transfer corotron for these particles. Follow the instructions in the user manual to clean the corotron; for the majority of small printers, this involves gently wiping the corotron wire with a cotton bud or a dedicated corotron cleaning tool. Because corotron wires are so thin and delicate, you must be extremely gentle when cleaning them or they could break.
Sharp White Lines
There may be a blockage in the developer unit that is preventing a small area on the developer roller from receiving toner if a page has a distinct white line running the length of it where print is absent. A small chunk of damp toner may obstruct the space between one of the “doctor blades” that are typically located directly above and below the developer roller and scrape away any excess toner.
If at all feasible, look for a line on the development roller that is toner-free (this cannot be done with printers that use print cartridges). Some printers come with a little cleaning tool that glides along the space between the blade and the development roller since they are prone to this issue. Follow the guidelines provided in the user handbook if they address this issue.
A corner of a piece of paper can occasionally be gently slid between the developer roller and the blades if no instructions are provided and the developer roller is visible. Lift the developer unit out of the printer and shake it from side to side if it is a user-removable component (i.e. one that can be removed without having to disassemble the printer with a screwdriver).
Variable Print Density Across The Page
There are a number of reasons why the print density, or how dark the page is, may vary from one area to another.
There may be a variance in the print density throughout the page when toner levels are low because, generally speaking, toner does not flow as readily as it does when the toner hopper is full. Put toner in the hopper to get around this. If the printer makes use of toner or print cartridges, take the cartridge out of the printer and shake it four or five times from side to side while holding it horizontally to redistribute the toner.
The printer might not be level if one side of the paper is consistently lighter than the other. Toner may progressively drift to one end of the toner hopper if the printer is not on a horizontal surface. To redistribute the toner, shake the toner hopper or toner cartridge. As most printers are not completely light-proof, some light may leak in if they are placed close to a strong light source (a lamp or a window), which could affect the photoreceptor and explain why one side of the page is lighter than the other. Move the printer to a different location if it is close to a light source.
Variable Print Density Down The Page
Contacts on the photoreceptor or developer roller may be filthy if there is a “banding” effect caused by the print density varying consistently along the page. A cotton bud can be used to clean any exposed metal strips on some photoreceptors and developer rollers that serve as electrical connections if they are unclean. We can discus more about Common Laser Printer Problems.
Take extreme care not to scratch the photoreceptor or development roller surface as you delicately clean these connections.
Grey Print
The print density setting and the photoreceptor are the two most likely reasons why the print appears grey rather than black.
Print density may typically be adjusted using a knob or a setting on the control panel on tiny laser printers. To make the print “blacker,” increase the print density option.
Grey prints result from photoreceptors that are worn down because they store less charge and transmit less toner from the developer to the paper. The standard response to this is to raise the print density setting until a new photoreceptor is required. It can be worthwhile to replace the photoreceptor sooner rather than later if the issue is especially severe.
The thin air at high altitudes may also contribute to grey print. Although it happens relatively infrequently, several laser printer models have had issues in high-altitude regions of South America.
Grey Background
The paper will seem softly grey if there is toner contamination on the page’s blank sections. This is typically brought by by too much toner due to an excessive print density setting.
Print density may typically be adjusted using a knob or a setting on the control panel on tiny laser printers. To get rid of the grey backdrop, try lowering the print density option.
Black Pages
In some printers, a broken or improperly connected charging core can result in a black page. Check to determine if the charging corotron is defective. Replace the print cartridge or photoreceptor unit with a new one if the charger corotron, which is a component of the unit, is damaged.
Try removing and reinstalling the print cartridge or photoreceptor unit if the charger corotron is not damaged or cannot be seen to be checked, as the electrical contacts between the removable unit and the main part of the printer may not be connecting properly. We can discus more about Common Laser Printer Problems.
White Pages
When the transfer corotron is damaged or improperly attached, it is possible for some printers to produce a white page. Check to make sure the transfer corotron is in good working order. Since the transfer corotron is typically integrated into the printer’s main body, a service engineer will likely be needed to fix it if it breaks. If the transfer corotron is not damaged, try taking out and reinstalling the toner cartridge, photoreceptor cartridge, or print cartridge from your printer.
Regularly-Spaced Spots (Large Interval)
There is likely a scratch, hole, small dent, or other fault in the surface of the photoreceptor if pages have spots on them that are regularly spaced down the page with a big gap between each place (a few inches). Examine the photoreceptor if it is removable. Replace the photoreceptor or print cartridge if a defect is discovered. If the photoreceptor cannot be removed, a service engineer may need to be called.
Regularly-Spaced Spots (Small Interval)
There may be a toner deposit on the fuser if papers have spots on them that are evenly spaced down the page with a short gap between each spot (likely less than 3 inches). Turn off the printer and give the fuser at least 15 minutes to cool. Check the fuser cleaning pad for any toner deposits that have been embedded, and replace it if necessary. The fuser rollers themselves cannot typically be examined; therefore, if the issue persists, a service engineer may need to be called. We can discus more about Common Laser Printer Problems.
Random Spots
Random stains in a printer’s mechanism are typically the result of dirt and spilled extra toner. Remove all consumables, wipe any toner off the housings with a tissue, and clean any toner from the printer’s interior. Avoid brushing toner onto the corotrons at all costs.
Residual Images
The print density is either excessively high or the photoreceptor is deteriorating if a portion of the image may be faintly seen “echoed” further down the page.
Print density may typically be adjusted using a knob or a setting on the control panel on tiny laser printers. To get rid of leftover images, try lowering the print density level.
The photoreceptor is probably worn out if the issue continues. Replace the print cartridge or photoreceptor.
Toner Rubs Off
It has not been thoroughly fused if the toner can be gently rubbed or brushed off the paper. Most likely, the fuser has a problem that keeps it from heating up to the proper temperature. Contact a service technician. We can discus more about Common Laser Printer Problems.
Mechanical Problems
Misfeeds and paper jams are examples of mechanical issues that are typically brought on by the media being used in a printer rather than the printer mechanism. The following are common issues.
Misfeeds
If the printer fails to feed a sheet of paper from the paper feeder, this is known as a misfeed. Misfeeds can happen with the right paper, but they are typically brought on by paper that is inappropriate for the printer—either because it is too smooth, too light, or too thick.
If there is a misfeed, take the paper out of the feeder and fan it out so that the sheets don’t cling together. Reload the paper, being sure to pack the curl in accordance with the printer’s manufacturer’s instructions.
Sometimes a paper tray’s springs, which push the paper upward onto the paper feed roller, become weak, resulting in frequent misfeeds. In this case, try adding more paper to the tray to compress the springs, have the springs replaced, or get a new tray. We can discus more about Common Laser Printer Problems.
It is possible to incorrectly insert the paper tray into some printer models, causing it to not seat properly. The paper tray should be carefully taken out and put back in, pushed all the way into the paper feeder.
The rubber surface of the paper feed roller may have become smooth from repeated misfeeds. A service engineer will be needed to fix the issue unless the roller that feeds the paper out of the tray can be seen and accessed. If this is the case, it may be able to lightly roughen the roller’s surface with emery paper. Another possibility is that the paper is slightly too big for the paper tray; if it is difficult to load and fits in the paper tray extremely tightly, it is probably not the proper size. Sometimes, paper is sliced improperly.
Paper Jams
A paper jam happens when a piece of paper becomes stuck in the printer’s mechanism or won’t go through it. Paper that is too heavy, too light, or damp paper may cause a paper jam, but many paper jams occur when using the right paper for no apparent reason.
In the event of a paper jam, carefully follow the instructions in the laser printer user manual to unclog the paper. The paper may have loose toner on it that hasn’t been fused and could contaminate the printer mechanism, so pay close attention to instructions that say to remove the paper in a certain manner. Paper may become stuck in the fuser rollers or between paper feed rollers; if you try to pull the paper through these rollers the wrong way, it will probably tear. We can discus more about Common Laser Printer Problems.
Always remove stuck paper gradually; never yank it out of the printer’s mechanism or pull it firmly because that could cause the paper torn. When a sheet of paper has been removed from the printer, check to make sure the entire sheet has been taken out; if a small piece of the sheet is still inside the printer, it will likely result in another paper jam.
If a paper jam repeatedly happens, there is likely an impediment in the paper path, and the most likely culprit is a little piece of paper left over from a previous paper jam.
Skewed Prints
The most likely reason for faulty paper loading or improper paper tray installation is if the image printed on the page is not perfectly aligned with the paper, i.e. the image is skewed.
Make sure the paper is correctly put below the “snubbers,” the tiny catches that hold the paper down in the tray, by removing it from the paper tray, fanning it, and then reloading it. We can discus more about Common Laser Printer Problems.
Make sure the paper fits snugly in the tray; if it can move around more than a millimeter or two, either the paper or the tray may be the incorrect size. Sometimes, paper is not trimmed to size as precisely as it should be. Reinstall the paper tray with caution, being sure you push it all the way in on both sides of the printer. We can discus more about Common Laser Printer Problems.
Make sure the paper guides are tightly closed against the paper if the printer has an adjustable paper tray to prevent any lateral movement. We can discus more about Common Laser Printer Problems.
Creased Pages
In the printer, paper can occasionally wrinkle. The most frequent reason for creases is damp paper, though they can also be the result of a paper clog, a crooked print, or a misfeed that didn’t completely happen. Replace the paper, and if the issue still exists, look into all the possible causes of paper jams, misfeeds, and skewed prints that were listed above.
Image Corruption
If there is an issue in the commands the computer transmitted to the printer, the printer may have misunderstood the commands or been unable to process them if the image on the page is incorrect. We can discus more about Common Laser Printer Problems.
Garbled (Rubbish) Data
The most likely reason for data jumble and meaningless text strings on the page is a communications fault. The formatting of all the data sent to the printer after a command can be impacted by a minor communications error, and all data supplied to the printer will be impacted by a significant communications fault.
Verify that the printer’s USB cord is properly plugged in, reset the printer (often by turning it off and on), reload any downloaded fonts, then print the document again.
If the data is still jumbled, the communications settings—especially if serial communications are being used—may be off. Verify that the printer’s and computer’s connectivity settings are compatible. Restart the computer if at all possible (the software controlling the computer communications may have crashed). If the issue persists, try a different communications cord and, if practical, use the printer with a different computer. We can discus more about Common Laser Printer Problems.
Print a status sheet. Most printers have a control panel function that allows you to print a status sheet. If the status sheet is illegible, there is probably a problem with the printer controller. We can discus more about Common Laser Printer Problems.
Lost Characters
Characters that periodically disappear from the text are most likely the result of a communication fault.
Make sure the cord that connects the printer to the computer is plugged in properly. Verify that the printer’s and computer’s connectivity settings are compatible. Use a different communication wire if possible. Try lowering the serial baud rate if a serial connection is being used. We can discus more about Common Laser Printer Problems.
Wrong Font
A communications fault, a software error, or a missing font may be to blame if text displays in the incorrect font or an unexpected font. Sometimes a communications glitch results in a page with the incorrect typeface; try printing the page again. If the issue still exists, make sure the printer has the desired font loaded.
Print out a font listing and make sure any font cartridges are plugged in properly (on most printers there is a function available via the control panel to print a font listing).
Verify that the computer software application is appropriately configured, and that the appropriate parameters are set in the printer driver, if the required font is listed in the font listing.
Reload the font if it was downloaded and does not appear on the status sheet. Check the font listing to determine if any additional cartridge fonts are missing if the font is a cartridge font. The connector on the cartridge can be damaged or defective. A service engineer might be needed if the missing typeface is supposed to be a resident font. We can discus more about Common Laser Printer Problems. We can discus more about Common Laser Printer Problems.
If the issue continues and the font is displayed in the printers’ font listing, there is likely a configuration issue with the computer’s software.
Split Graphic Image
The most common reason for a graphic picture to be divided over two pages is that the printer does not have enough memory to handle the page. This could be because the printer needs additional optional memory to process complicated pages and huge images, or it could be because a component of the printer’s memory has broken.
If the issue persists, make sure the printer has enough memory and, if necessary, install additional memory.
Remove and reload any memory upgrade choices if the printer has enough memory. Print a status sheet, which typically lists the installed memory, then use the printer’s self-test feature to see whether any memory issues are recorded.
Read More:
HOW TO FIX PRINTER PROBLEMS |
FIVE FAST TIPS TO IMPROVE YOUR PRINTING |
THE PRINTER SAYS “READY,” THE SYSTEM SHOWS IT IS PRINTING BUT NOTHING HAPPENS. |
Most Common Printer Problems and Their Solutions |
Split Text
If text spans two pages, the software application providing the text most likely has a configuration issue. Verify the software setup to make sure the margins and page length are set correctly. We can discus more about Common Laser Printer Problems.
Split text is extremely rarely a printer issue, although it might happen if a page has a lot of characters on it and the printer doesn’t have enough memory to handle it. A full page of 6 point type, for example, includes significantly more characters than a page of 10 or 12 point text, and may be too much for some printers to print. We can discus more about Common Laser Printer Problems.
Miscellaneous Splits
The printer controller most likely made a mistake if a split on a page results in a horizontal gap in the image across the page that separates graphics and characters. This could happen once in a while at random, in which case the sole fix is to reset (turn the printer off and on), or it might happen frequently. If the issue recurs frequently, either the printer controller’s memory or printer controller itself may be malfunctioning. We can discus more about Common Laser Printer Problems.
If you need to improve printer performance or if you have any printer-related issues for your home or business, get in touch with the IT Support Guys at www.insystemtech.com right immediately. In addition to other IT services, we offer desktop support to ensure you get the most out of your system. To talk with a, dial +18885065226. Powered by Argusdna.