How to Speed Up Windows 10: Because software is becoming more dependent on hardware, it is inevitable that the speeds of all laptops and desktop computers will eventually slow down at some point in the future. How your personal computer reacts to these changes can have a considerable impact on the way it performs.
In this article, you will be provided with all of the essential changes and recommendations, as well as some expert advice, that will assist you in accelerating your sluggish laptop and making it faster.
You will discover how to speed up a laptop or computer by following the steps in this article.
How to Make Your Windows 10 Computer or Laptop Faster

In order to learn how you may increase the speed of your computer or laptop, follow these instructions.
Step 1) Uninstall unnecessary Software
Your laptop comes packed with a variety of apps, the majority of which will go unused by the majority of laptop owners. Nevertheless, these applications will consume a significant amount of storage space on your laptop. You will be able to tell that this has occurred when a pop-up message appears advising you to update software that you have never used before.
To remove any previously installed software
Step a ) go to control panel->Under Programs->Click Uninstall a program
Step b) Right-click on the program you want to uninstall
Read more:
| MFA Meaning: What is Multi-Factor Authentication? |
| 8 Perfect Simple Steps to Fixing Your Printer |
| Computer Printer Repair |
| 13 Common Printer Problems and How to Fix Them |
Step 2) Close system tray programs
When you discover that your laptop starts up very slowly, it is possible that this is because your laptop is packed with an excessive number of apps that require it to start.
The next step that you must take is as follows:
Step a) To open the system tray, you must first click the arrow pointing upward that is located to the right of your taskbar.
Step b) It will show you all the programs that are currently active, allowing you to close any that aren’t needed and remove them from the taskbar.
Step 3) Stop programs running on startup
Some applications in Windows 10 that run automatically when the operating system boots up can also cause your laptop’s processing speed to decrease, just like programs that are running in the tray.
You should keep the apps that you want to use, such as free antivirus software, but there may be others that are unnecessary, and you should uninstall those in order to make your laptop work quicker.

Step a) To open the Task Manager, you may either right-click on the taskbar and choose Task Management from the context menu, or you can press Ctrl-Shift-Escape.
Step b) When you open the Startup page, you will be able to see all of the items that execute on startup, as well as the impact that each of those items has.
If you follow the steps mentioned above, you should be able to improve the overall performance of your laptop by turning off any high-impact processes. Also, it enables you to disable programmes that are essential for the operation of Windows+; however, it is not recommended that you close these apps. For instance, those that have Microsoft identified as the publisher should be ignored completely.
Right-click on any of these services, and then select the Disable option from the context menu. Keep in mind that you are only exiting that programme, which you do not want to launch automatically whenever your computer boots up.
Step 4) Defrag your hard disk
The fragmentation problem affects mechanical hard drives quite frequently. This occurs due to the fact that the many bits that comprise a complete file are dispersed across the physical surface of the drive platter.

Reorganizing the data on the disc is made easier by the defragmentation approach. As a result, the bits that make up the individual files should be grouped together in the same physical location, as this will boost the speed at which the hard drive can access the data.

To defragment your hard disk:
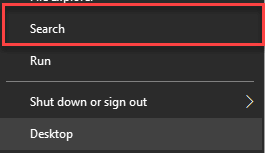
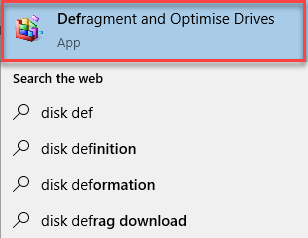
Step a) First, you need to select the search bar on the taskbar and enter defrag word.
Step b) Select Defragment and Optimize Drives.

Step c) You need to select the disk drive you want to optimize.
Step d) Select the Optimize button.
Step 5) Select Opaque Effect
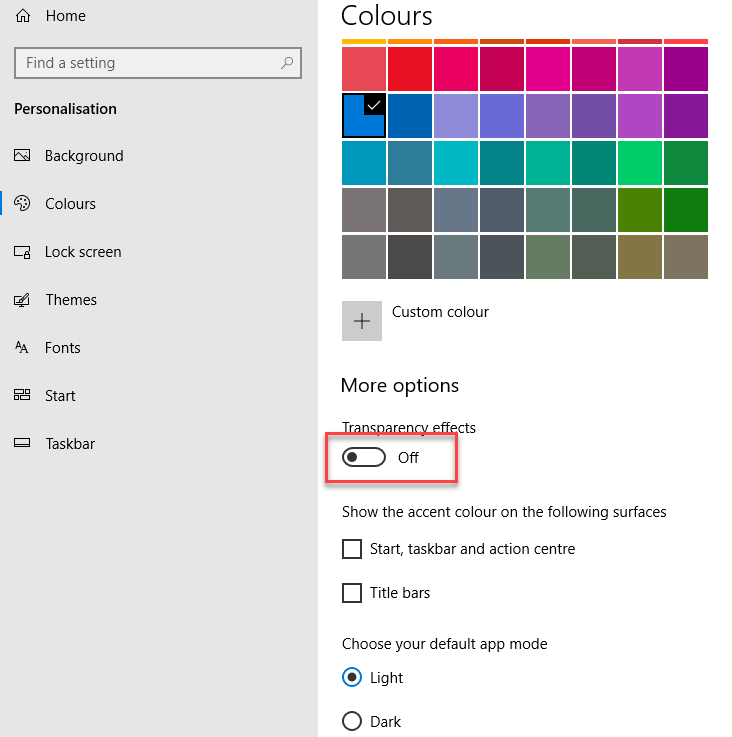
The new Start menu in Windows 10 is highly see-through, but this transparency comes at a cost to your system resources. You can reclaim the resources you previously used by disabling the transparency feature in the Start menu, action centre, and taskbar, respectively:
In order to accomplish that, you will need to carry out the following steps:

Step a) Open the Settings menu.
Step b) Select the Personalization and select option Colors and toggle off.
Step c) Make Start, taskbar, and action center transparent.
Step 6) Add more RAM to speed up the Laptop
Your Windows 10 computer or laptop may benefit from the addition of virtual memory provided by a RAM. The operating system grinds to a standstill and moves at a much more glacial pace when there is less Memory available.
In a nutshell, the more you use your computer, the greater the likelihood that it will start making use of the virtual memory. So, if you make heavy use of your laptop or desktop computer, you should always make sure that it has sufficient amounts of RAM (random access memory).
You may enhance your laptop’s performance and make it run more quickly by installing more RAM modules.
Increasing the amount of RAM that your computer has will allow you to multitask more easily and improve its overall performance. Before you can add extra Memory to your laptop, you need to have a working knowledge of its motherboard, including the maximum amount of RAM it can accommodate and the types of RAM that it supports.
After that, you will need to locate the RAM slots that are available on the motherboard of your laptop.
For instance, if your laptop has two RAM slots and can support up to sixteen gigabytes of 1600 MHz DDR3 memory, and it already has one RAM module that is eight gigabytes and operates at a frequency of thirteen hundred megahertz, then you can add a second RAM module that operates at a frequency that is either one gigabyte, two gigabytes, four gigabytes, or eight gigabytes to achieve the best performance possible from your laptop.
Step 7) Reduce the Boot Menu time-out
The boot menu appears on the screen of your laptop for a predetermined amount of time at the first stages of the startup process, before the operating system loads. You may now launch Windows 10 in Safe Mode with the aid of this.
You can cut a few seconds off of the time it takes for your computer to start up by adjusting the time-out for the boot menu, which is normally set to 30 seconds. You can accomplish this by following the steps that are outlined below:

Step 1) Right-click on the Start button and click Control Panel.
Step 2) Go to System > Advanced system settings, and under Startup and Recovery, click Settings.
Step 3) Next to Time to display a list of operating systems: you should change the value from 30 seconds to 10 seconds and then click the OK button.
Step 8) Check for spyware and viruses to speed up Laptop
In order to make your laptop run more quickly, you must install software that scans for spyware and viruses. You may verify which antivirus programme handles your computer to scan and eliminate hazardous software to speed up the Laptop. This can be done by checking the computer’s properties.
You should also invest in antivirus software to safeguard your computer from harmful programmes and protect the data on your hard drive. Antivirus software can be utilised to remove malware that is currently in circulation.
Be sure that you have an antivirus programme that can scan your laptop for harmful viruses in order to avoid having your laptop’s performance degrade as a result of using antivirus software. Malware is not a significant contributor to the sluggishness of your machine.
But, you should always make sure that you have antivirus and security software installed on your computer in order to secure your hard drive, memory, CPU, network, and firewall. To remove malware from your computer, you can use an antivirus program such as AVAST.
Step 9) Disable automatic Updates
In most cases, it would be beneficial if you did not disable the automatic updating of the software. It is the simplest method available for protecting your computer from cyberattacks and resolving compatibility concerns at the same time.
If you turn off all of the automatic updates, it is possible that your laptop will become susceptible to significant security issues.
On the other hand, there are situations that could be excused under certain circumstances. Take for instance the scenario in which you are utilising your laptop as a gaming device. At that time, there is a good chance that game distribution services on your computer, such as Steam and Epic Games, are storing many substantial updates and patches.
To be able to run the Games after installing those updates, both your software and hardware will need to be compatible with the latest versions.
You need to disable any vital software or useless services, such Windows services or antivirus updates, that are set to update automatically.
Imagine, though, that you are under time pressure to complete the updates. In this scenario, you have the option of scheduling the download and installation of the updates at a time when you are not likely to be using the device, such as the middle of the night or over the course of the weekend.
Step 10) Check your power plan
When using a laptop, it is essential to examine the power plans that can be found in the Control Panel.
To change your power settings, open the Control Panel, choose System and Security, and then click Power Settings. In this section, you can find information regarding the power plan that your laptop is using at the present time.

There is a good chance that you are in Balanced mode. You can now select High Performance mode if you require higher performance and you have some heavy usage, or you can select Power saver mode if you have little usage. Both of these modes are available to you right now.
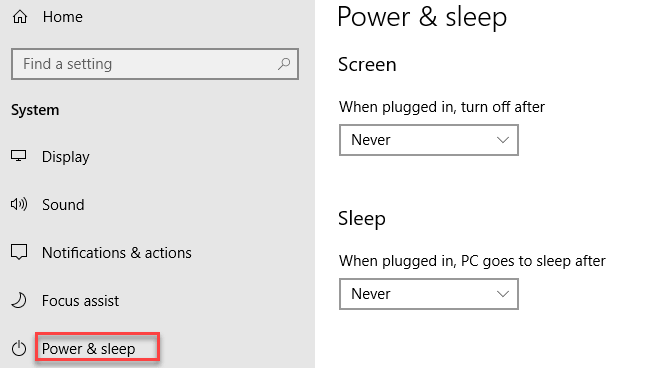
Step a) Select -> Settings app’s System > Power & sleep option
Step b) Click the Additional power settings link.

Step c) Click the drop-down arrow on the right side to “Show additional plans” and select High Performance.
Step d) And then select the high-performance option.
Step 11) Analyze your web browser
You may make a noticeable impact in the speed of your laptop by making a few straightforward tweaks. The speed at which web pages, videos, and images load could either be slowed down or sped up depending on the web browser that you are using.
If you have been utilizing a particular browser and have noticed that there is a delay period, then you should think about switching to a different selection that has faster loading speeds.
Not only does the browser you use slow down your System when you are using it, but if you have a full cache that has not been deleted in a while, it will certainly cause a lag in the performance.
If you have not cleaned your cache in a while, it is recommended that you clear it out. You need to go into the settings of your browser and make sure that the history, cache, and cookies in the browser are all cleared out before you can fix this problem.
The only content that is stored in your cache is that which you will obtain while browsing different websites. When you visit a website, many websites will employ cookies and advertisements, some of which you may click on, to learn about your surfing behaviour. These files are stored as information within a cache.
If you spend a significant amount of time on the internet, clearing the cache on your laptop is an absolute must. On the other hand, it is simple to correct. In the most common online browsers, you can accomplish this in one of two ways:
- For Google Chrome:
- Go to Settings-> Privacy and Security
- Select Clear Browsing Data
You can see that Chrome gives you the option to delete data once a certain amount of time has passed. But, you should pick “All time” if you have never cleared out the files that are stored in your cache previously.
- Select -> “Cookies and other site data,” and “Cached images and files.”
- Select the “Clear data” option.
You are also given the ability to clear passwords, autofill form data, site settings, and hosted app data when you select the advanced option.
Before you remove the data from your device, you should make sure that your favourite websites are bookmarked.
Step 12) Shut off Windows tips and tricks
Windows 10 will monitor what you are doing and provide suggestions for additional things you could do with the operating system based on what it sees you doing.
Windows 10, which monitors your activity and provides suggestions based on that monitoring, may also cause your laptop to function more slowly. Thus, if you want to get things forward more quickly, you should exit Windows 10 Tips and Tricks. To do so,

Step a) Click the Start button, select the Settings icon.
Step b) Go to System and Select the Notifications & actions.
Step c) Scroll down and select the Notifications section and then disable “Get tips, tricks, and suggestions as you use Windows.”
Step 13) Clean up your Disk
You will need to launch the Disk Cleaning application, which has always been included in the various versions of the Windows operating system. This tool for cleaning up your hard disc also assists you in locating unnecessary rubbish on your computer, such as temporary files, offline Web pages, and installer files. In addition to this, you will see that your recycling bin is full. If your hard drive is getting close to being full, this will have a considerable impact on the speed at which it operates.
But, if you do not have regular disc cleanup scheduled, you can set this up through the Optimize Drives utility if you do not already have it set up. After clicking the Start button, you will see a search field for Cortana; type the item’s name into that box to locate it.

Step a) Go to Control Panel
Step b) Select the System and Security> Administrative Tools and
Step c) Select the Disk Cleanup option.

Step d) Select the cleanup system files option.
Step 14) Adjust or disable graphics and animations
Windows comes preloaded with a tonne of visuals, some of which are animated, including flyouts and fading effects. This not only makes the application look cleaner and more polished, but it also contributes to a more positive experience for the user as a whole. Also, it can cause your computer’s speed to decrease.
As a result, the best course of action is to modify or deactivate these settings in the most recent version of the Windows operating system. Perhaps, this will free up some of the processing power.
Step 15) Turn on automated Windows maintenance
Windows 10 will run automatic maintenance on your computer on a daily basis, but you won’t even notice it. It serves a variety of purposes, including as performing system diagnostics and security scanning. If it does detect any problems, it will also assist you in ensuring that they are automatically rectified and resolved for your convenience.
Because of this, your laptop will be able to perform at its highest possible level. If you leave your device hooked into a power source while it is sleeping, the automatic maintenance will run at 2:00 AM every day, regardless of the time zone you are in.

It is possible for this capability to be switched off inadvertently at times. Alternatively, if you have not had your laptop plugged in for a while, the necessary maintenance may not have been performed. You have the option of turning this on in your system so that it will automatically run every day, or you can choose to run it manually instead.
Step a) Run the Control Panel app and select System and Security > Security and Maintenance.
Step b) In the Maintenance section, under Automatic Maintenance, select “Start maintenance” if you want it to run that immediately.
To ensure that it runs each and every day, follow these steps: • On the screen that displays, click the link that says “Change maintenance settings.”
•
Check the box next to “Allow planned maintenance to wake up my computer at the scheduled time,” then click the OK button once you have selected the time at which you would like the maintenance to be performed.
Step c) Go to Control Panel>System and Security>System>Advanced system settings.
Step d) Open the performance section and select the Settings, having a full list of options.
Step e) You can select and Adjust for best performance, or you can remove it individually.
Step 16) Update device drivers
If something on your laptop isn’t working properly, updating your drivers is frequently a quick and easy solution to the problem. It is usually a good idea to maintain the most recent version of your device drivers whenever it is possible to do so.
a) Right-click the “Home” button, then select “Device Manager” from the context menu to see whether there is an available upgrade.
b) To upgrade the drivers for a specific device, right-click the device in question.
On the other hand, let’s say you decide to alter some aspect of your physical setup. If this is the case, you will need to reposition it within the Device Manager in order to update the drivers and make certain that everything is operating as it should.
Step 17)Contact the Windows Support
If you continue to run into the same problem over and over, this is your very last possible course of action. Send a concise email describing the issue to the Windows Support Team, and then wait for them to find the answer and resolve the issue.
Few other important tips
Uninstall unwanted browser extensions: As they can definitely make your browsing experience more sluggish, you should make sure to perform this task on a regular basis.
19: Run fewer programmes in parallel: Unlike multitasking, which can be damaging to your productivity, running fewer programmes in parallel can help you get more done.
The performance of your computer may suffer if you have a large number of applications open at the same time. Hence, instead of just reducing the apps, you should choose them and exit them completely. You will observe a certain amount of progress.
20. Reinstall the Operating System If you have tried everything else and are still having problems, the final solution to this issue is to install the most recent version of Windows.
21. Keep your computer clean: Although this may seem like a no-brainer, dust and filth that has gathered on your computer can cause it to run more slowly. When you clean your computer with your hands, you can make it run faster and keep it from overheating.
22.Stop using One Drive: You will need to cease using One Drive since it may consume a significant amount of memory (RAM). You will need to examine the system tray for further information regarding that.
23. Control your temps: If you want to keep an eye on the temperatures of your system, it is a good idea to utilize a program that monitors the temperature of your CPU.
24.Set a system restore point and restore your system to its previous state to complete Task, which requires you to complete the following steps:
• If you want to restore your copy of Windows to an earlier point in time, you may do so by clicking the large “System Restore” button. • By default, your computer should regularly make these restore points, but when it does so, it saves over the most recent version.
Convert to Linux Changing your laptop’s operating system to Linux is your last ditch effort to bring it back to life. It is possible that not everyone will have this choice, but it is still something that should be taken into consideration.
Speed Up Windows 10 Support In USA
From individual tech support seekers or startups to Fortune 500 companies, one aspect they all have in common is the need for quality reliable Computer Tune Up Services In USA. InSystemTech provides best-in-class, fully remote, IT Support and Tech Services for startups, small and mid-size companies, self-employed professionals, or any individual consumers. We know How to make Slow laptop faster.
We offer comprehensive plans to meet different business or home needs plus access to our custom software platform to keep your business or home system running optimally and securely. We are powered by Integral Systems and Argusdna


